Guide Getting started
Build your first room in prostir zvuku
A room is just a few nature sounds placed around you. Here is how to put your first one together in a couple of minutes — and make it one you actually come back to.
The nice thing about building a room in prostir zvuku is that it looks more complicated than it actually is. When you first open the app, it is easy to think you need to construct some elaborate sound design scene before it starts to work. You do not. A believable room usually starts with one steady layer, one or two smaller details, and a little bit of restraint.
That restraint matters. The goal is not to cram the canvas with as much sound as possible. The goal is to make something that feels natural enough to disappear into the background. If your first room does that, you have already done the important part.
1. Start with one steady layer
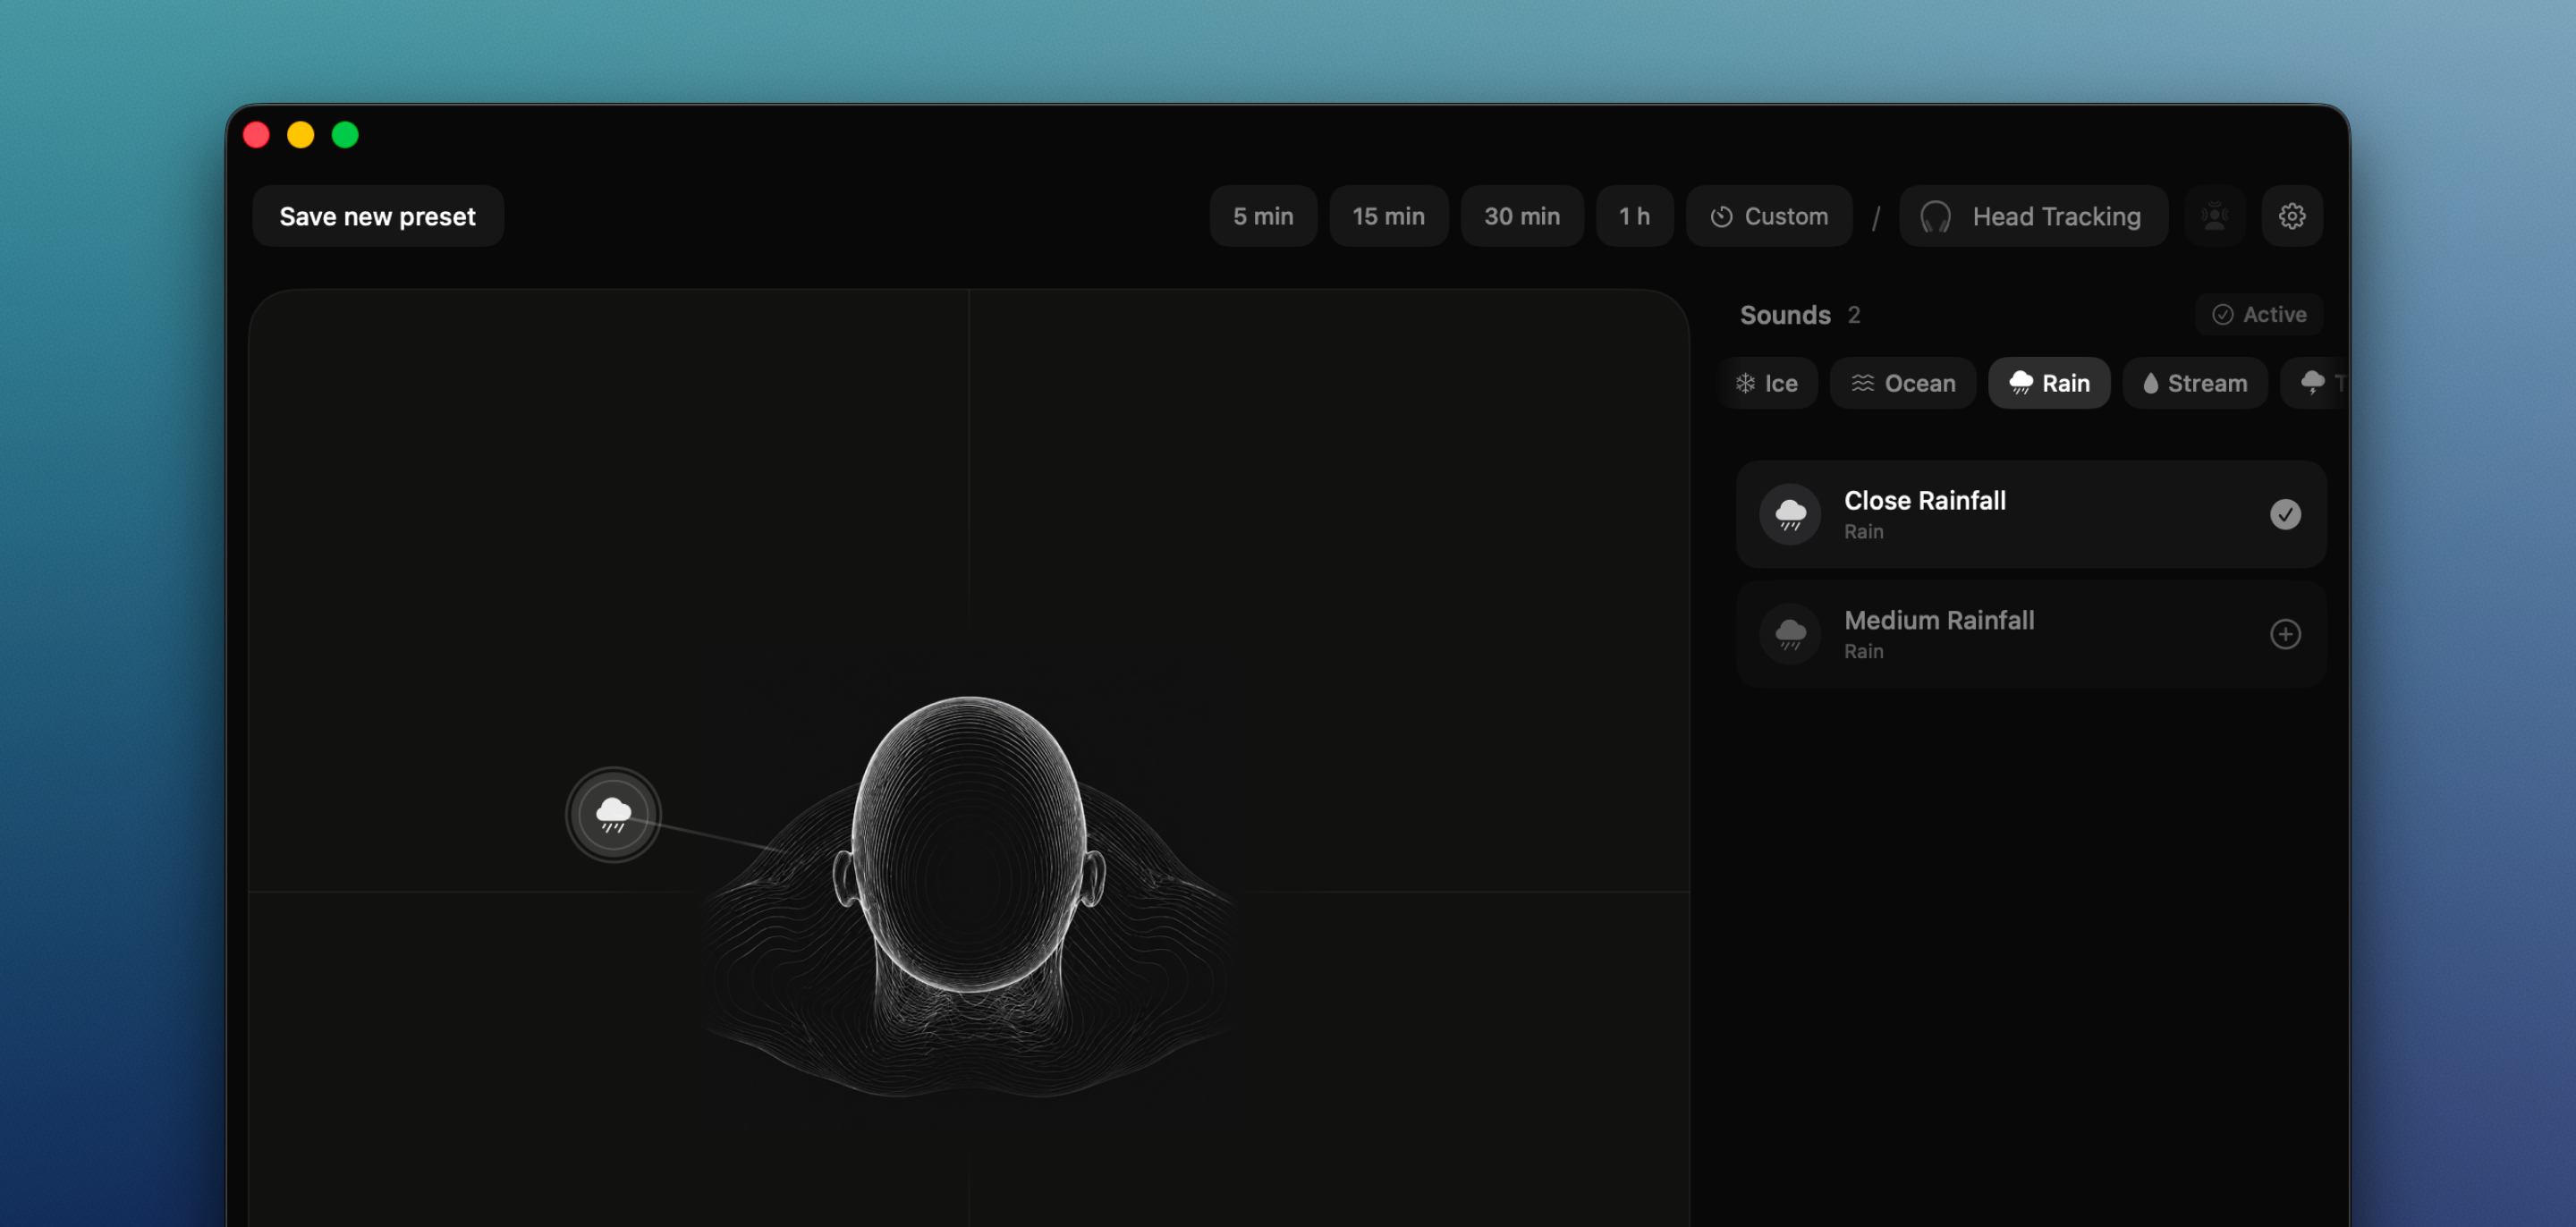
Begin with something continuous. Rain is good. A calm ocean is good. A steady stream can work too. The point of the first layer is not personality, it is stability. You want a base that quietly fills the room without constantly pulling your attention back to itself.
Add that first layer and let it play for a moment before doing anything else. It helps to hear the room begin with one element instead of stacking everything at once and trying to untangle it afterward.

2. Place it on the canvas
Once the base is playing, place it on the canvas and move it until the room starts to open up. For a base layer, I usually like something a little wide and slightly ahead rather than collapsed directly on top of me. It feels more like a space to lean into and less like a sound pressed against the ears.
There is no single correct spot here. The useful rule is simpler: if the room feels calmer and more believable when you move the layer, keep going in that direction. Your ears will tell you faster than any diagram will.
3. Add one or two details
Now give the room a little character. This is where a low fire, a few birds, or a more distant stream can help. Not five things. Not ten. One or two details is usually enough for a first room. Think of them as the parts that give the space shape, not the parts that are supposed to dominate it.
Try to place those details away from the base rather than directly on top of it. A room starts to feel deeper when its sounds are not all competing for the same spot. Also, keep these layers quieter than the base. The fastest way to make a room tiring is to let a detail constantly ask to be noticed.
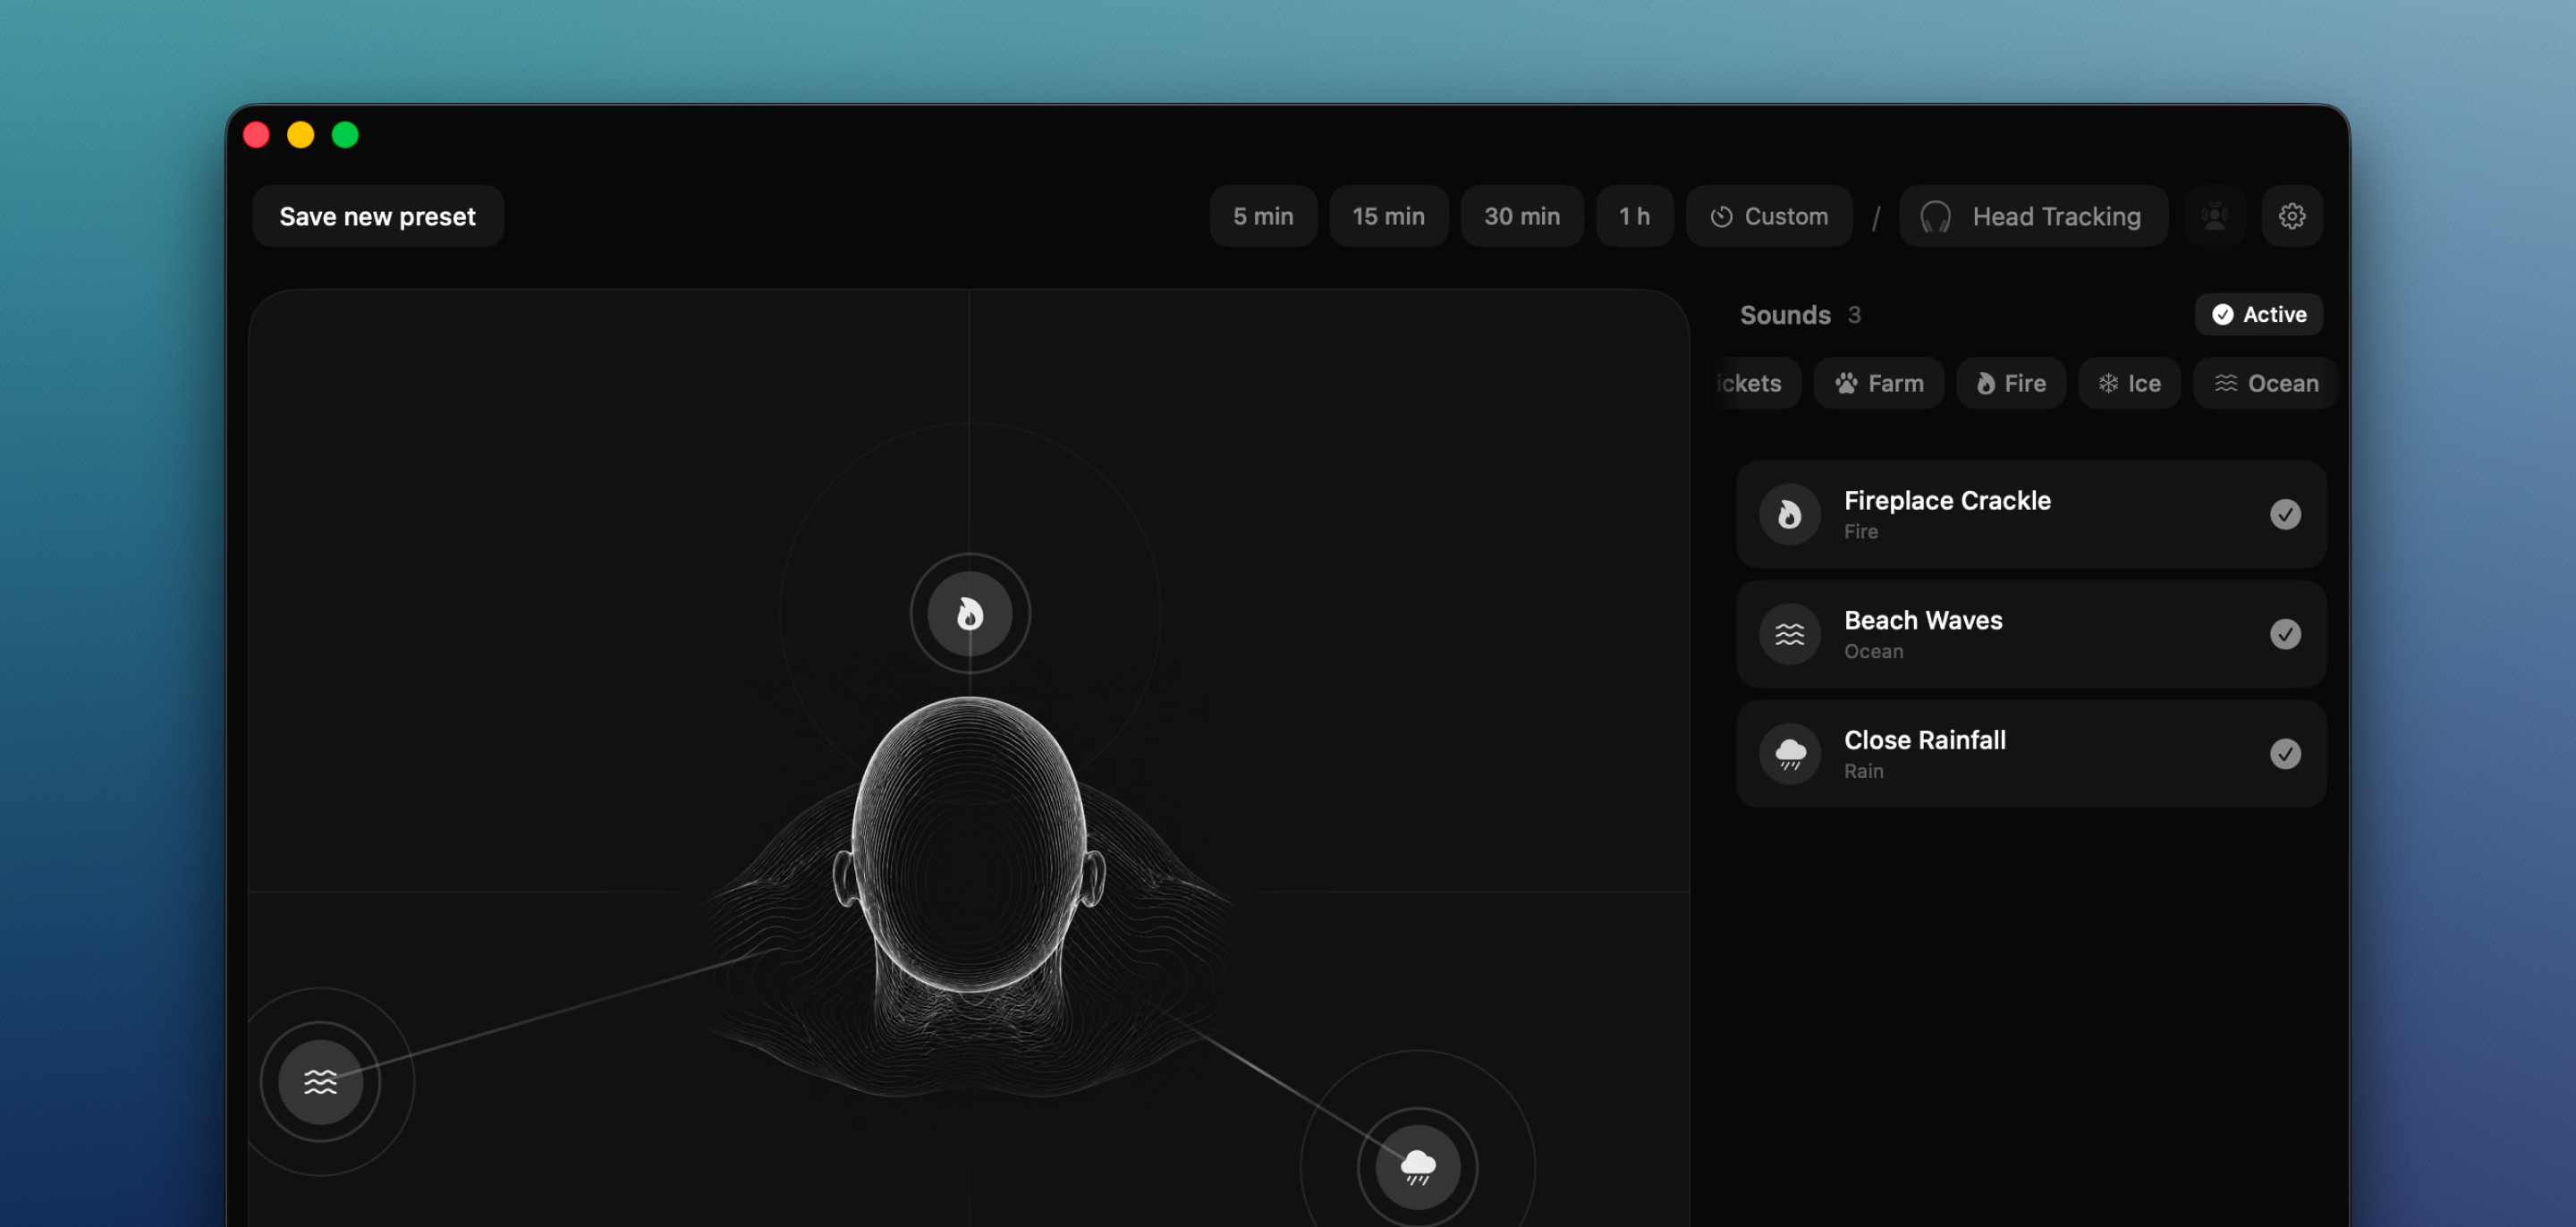
4. Balance the mix
Once the pieces are in place, stop moving things for a second and just listen. The base should sit underneath everything else. The details should come through, but only as texture. If one layer keeps stepping forward and demanding your attention, pull it back.
This is a useful rule to remember: the best room is usually one you stop noticing within a minute. If it feels impressive but hard to ignore, it is probably too loud, too busy, or both.
5. Set a timer
If the room is for a focus block, a reset, or sleep, set a timer. One of the small pleasures in the app is that the room fades out instead of ending with a hard stop. That sounds minor on paper, but it makes a real difference, especially at night when you do not want a sharp cut to remind you that software is involved.

6. Keep it close
Once the room feels right, you do not need to sit in the editor and admire it. Close the big window if you want. Pause, resume, and adjust things from the notch or the menu bar while you work. That is part of the point: the room should stay available without becoming a separate activity.
And if you are using Lifetime Pro, this is also where saved rooms become genuinely useful. Instead of rebuilding the same feeling every day, you can come back to the version that already worked.

7. Save the room you want to return to
Once you have a room that really works, it is worth keeping. That may sound obvious, but it changes the way the app fits into daily life. Instead of rebuilding the same setup each time, you can keep a room for focus, another for sleep, another for a late-night reset, and come back to each one when the moment calls for it.
This is where the app starts to feel less like a sound experiment and more like a real tool. You stop asking “what should I build today?” and start reaching for rooms that already belong to your routine.

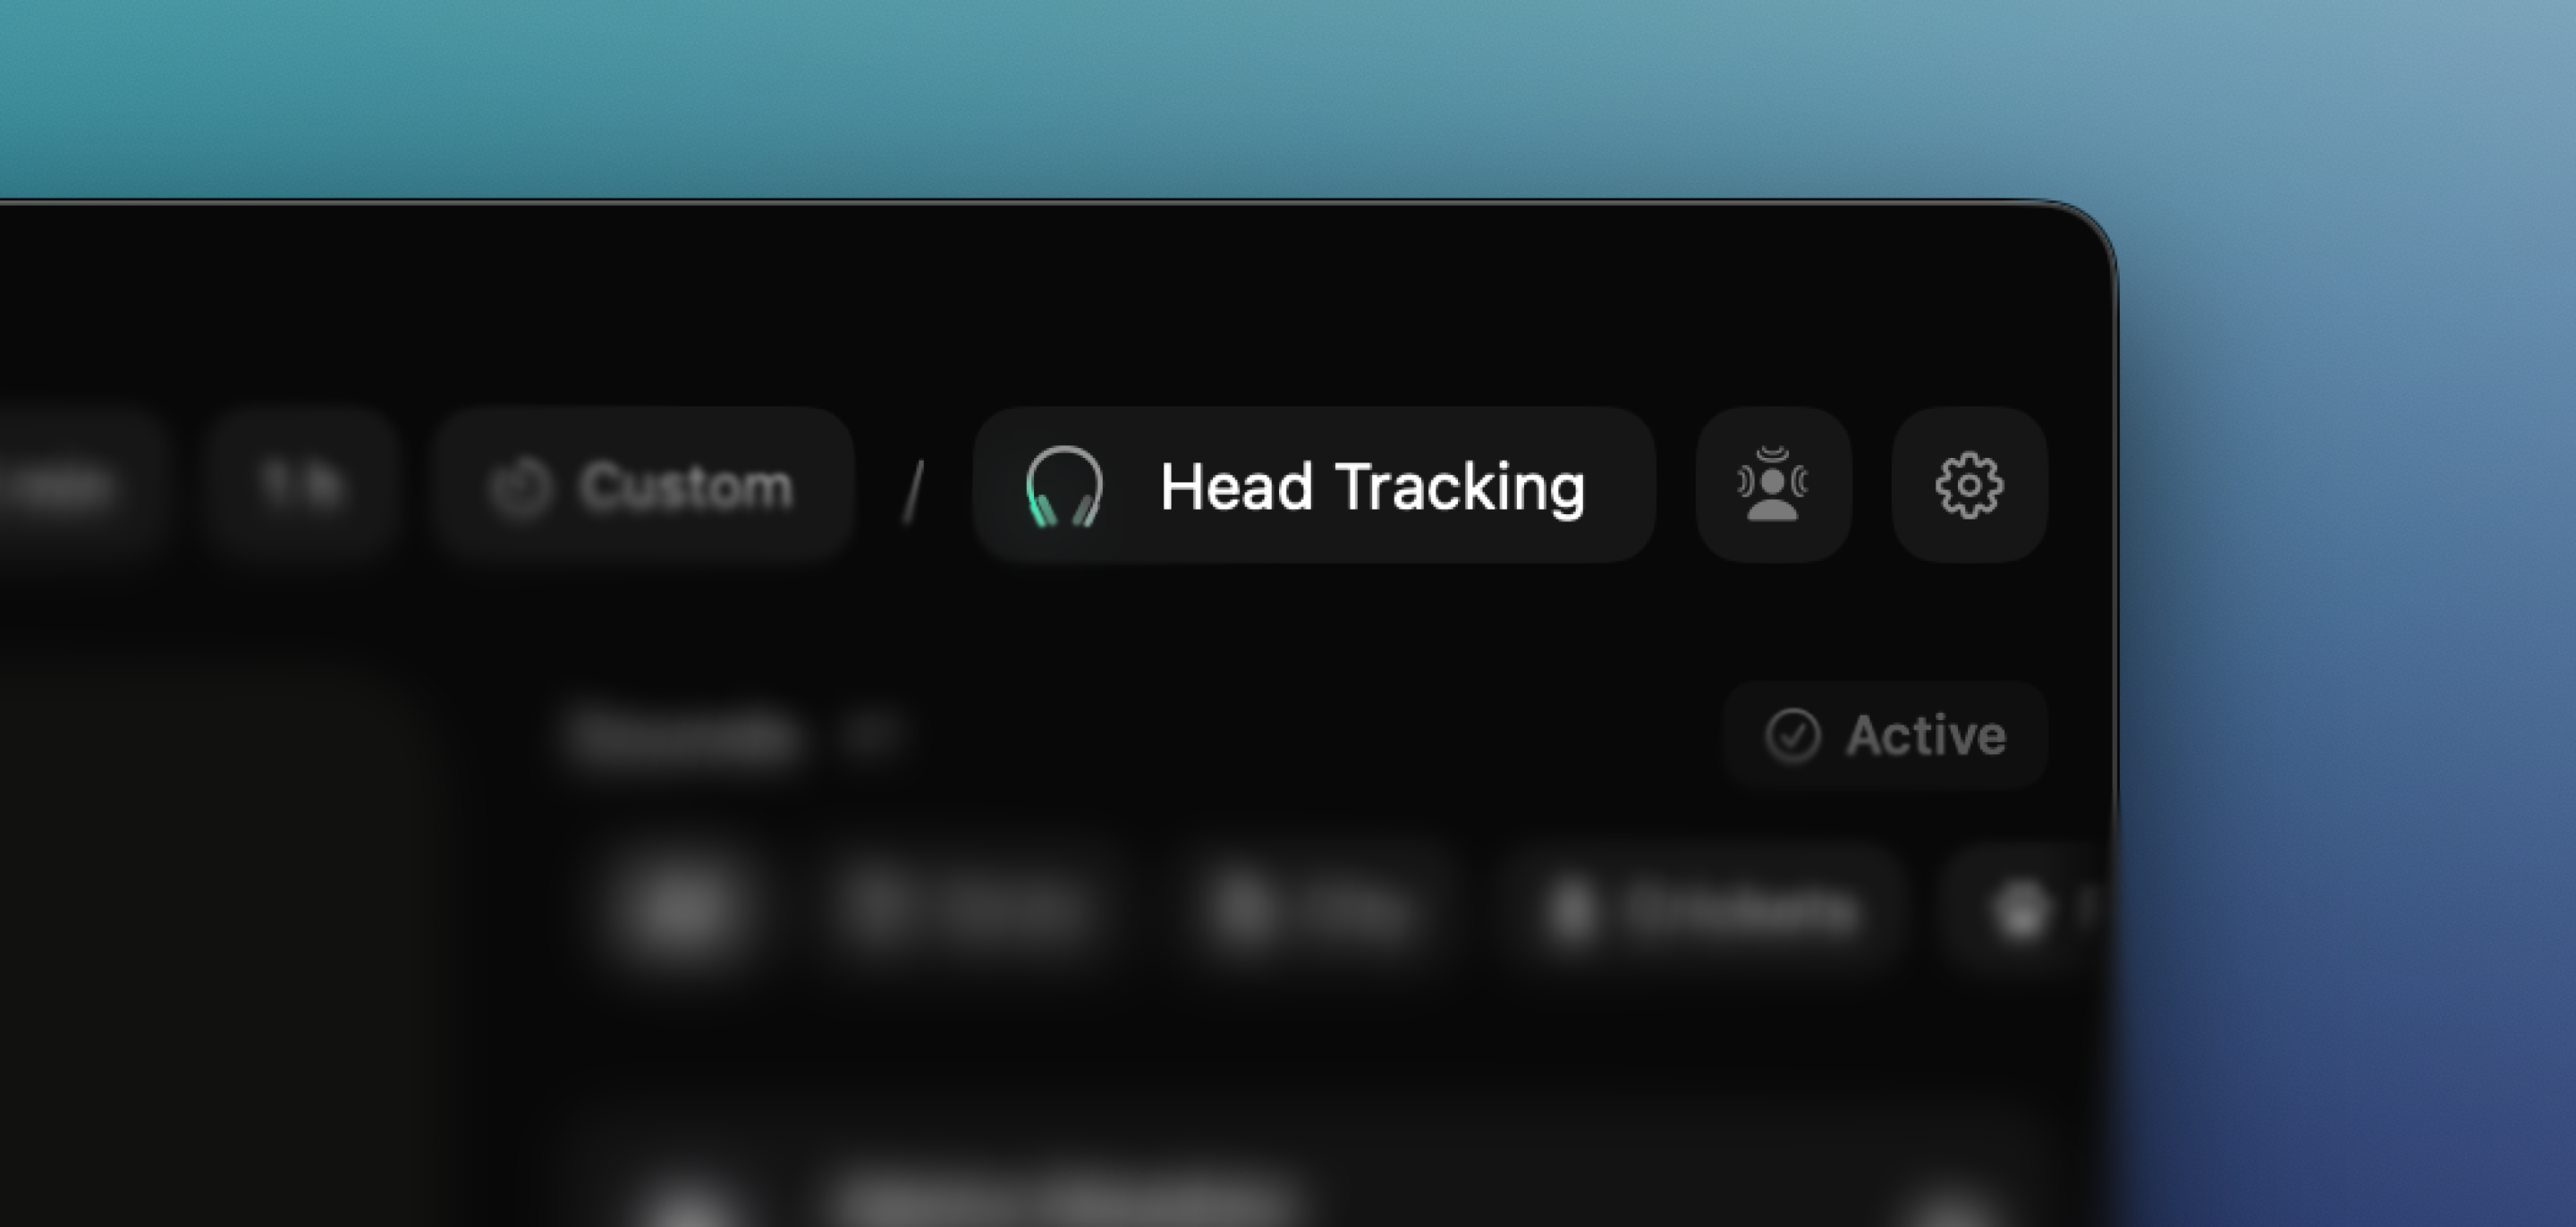
8. Optional: anchor it with head tracking
If you have supported AirPods, one extra step is worth trying: turn on head tracking. The room then stays fixed in space as you move, so turning your head no longer drags the whole scene around with you. For some people that is the moment the room really clicks and starts feeling physical rather than merely spatial.
It only takes one tap, and there is a dedicated button to recenter the scene whenever you shift position. See the head tracking guide for the details.
Start small
That is really the whole craft of a first room: one steady base, a detail or two, and enough balance that the result can disappear into the background. Add more only if the space still feels too empty. Do not add more just because the canvas allows it.
The goal is not more sound. It is a believable place your attention can rest inside. Once you feel that, even briefly, you will know what to listen for in every room you build after that.